

 Start with a square piece of paper, not card stock, doublesided if you have any. The larger the square, the larger the flower will be. Fold, corner to corner. Keep folding until you have a "ice cream cone" shape.
You have some options for cutting the top of the flower. You can make it pointed, as shown, or you can round it up, like the ice cream on top of the cone. Try experimenting with pinking scissors and some of those shape scissors for a variety.

Cut slits between all of the pedals...about 1/4" to 1/2" inch long. Take care to not cut too deeply or you will cut out a pedal. The smaller the flower, the smaller the slit must be. Use inks, chalks, paints, Shimmer Mist, whatever you want to add variation to the flower. Repeat this for about 5 to 6 layers, getting progressively smaller with each layer.

Dot the center of each section and stack, finally using a brad in the center to hold them all together. You can then add Stickles in the center to make a center..or just keep the brad as the center. Black brads look great with yellow flowers. I like to mix my colors to create a new or unusual looking flower. Rough up all the petals and push them up to the center to create dimension.
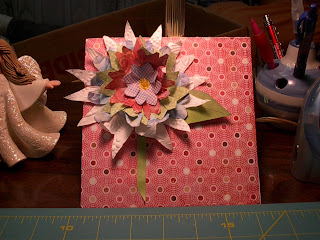
Here is the end product: